Insta360 ONE X2 SEAMLESS TRANSITIONS in Insta360 Studio
12:25 AMIn this article I show you 5 creative Insta360 ONE X2* seamless transitions, which you can easily try out yourself. Before I start with the tutorial here is an important information!
Currently there is a special Insta360 Gimbal Guru Deal. With the code "GIMBALGURU" you get a 5% discount on your Insta360 ONE X2* and on top a free gift additionally. Don't miss this and get your Insta360 ONE X2* now. Check out the Link *HERE*
Check out my Insta360 ONE X2 SEAMLESS TRANSITIONS video here:
Spin-tilt transition
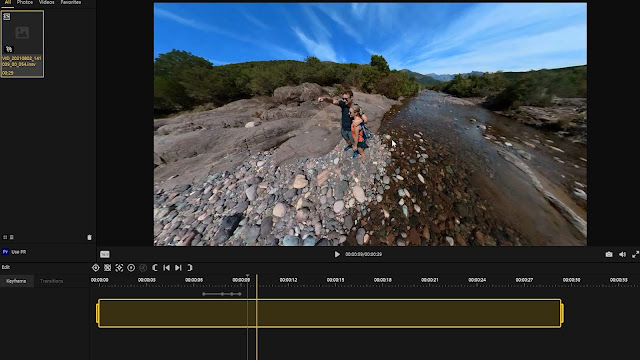
The first transition is the spin-tilt transition. Use your Insta360 ONE X2 in combination with the selfie stick to open the sequence by moving the ONE X2 from top to bottom. Additional you can add a slight tilt & pan reframing movement. Then move the Insta360 ONE X2 close above the ground to get a lowground Shot. To achieve the spin-tilt transition, you simply have to add a fast tilting down movement in your Reframing Software. I show you how you achive this in Insta360 Studio.At the point where you want to start, set the first keyframe. Some seconds later you set another keyframe, where you tilt the perspective downwards. Now you can playback the Shot. If you want a faster Spin-tilt movement, decrease the distance between the keyframes.
To get a smooth transition, I recommend you to use the Fade-In Fade-Out Transition. Click on the line between the two keyframes, and set the keyframe transition to Fade-in Fade-Out.
Then export the first clip. In the next step we continue with the second sequence.
This clip starts with a low ground shot and then the surrounding area is revealed. Again add the spin-tilt movement with keyframes in Insta360 Studio. Don’t forget to set the keyframe transition to Fade-In Fade-Out. Also make sure, the keyframes for the spin-tilt movement are about the same distance as the first clip, which means they have the same tilt- spinning speed. This is important otherwise the transitions looks unnatural. Export the second clip.
Now both clips have to be put together to complete the spin-tilt transition. You can use any video editing program for this. In my example I'm using Adobe Premiere Pro.
Import the first clip and look for the spot where you want to jump to the second clip. I recommend a place where the exposure and the colors are similar. For example, when the sky is visible in the picture. Then there is a hard cut as a transition to the second clip, where the image looks similar. If you playback the video now you will get the final spin-tilt transition.
Whip Pan transition
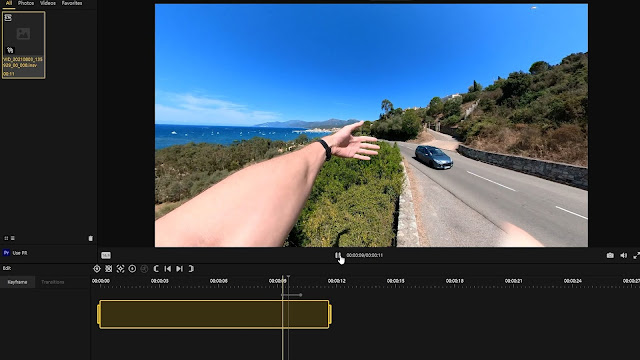
The second transition is the whip pan transition. This one is very easy to create. In this example I used a POV Shot and my arms to control the transition. Set the first keyframe where you want the wip pan transition to start. A few seconds later, set the second one and change the pan angle. Don’t forget to change the keyframe transition again to Fade-In Fade-out for the best result. Do the same with your second clip and export both. Then combine both clips together in your video editing software. You can use a hard cut or a soft blend transition. It's that easy to create a whip pan transition.


360-circuit transition
The third transition is the 360-circuit transition. For this one, you have to circle an object. In the first clip, simply circle the object once. Open the clip in Insta360 Studio and reframe the Shot so that the object always stays in the center of the image. Then click on the first keyframe an select the TimeShift button. Select the range up to the last keyframe and set the speed factor to 16x. Also make sure Motion Blur is activated. Then export the first clip.You do exactly the same at the second clip. Use your video editing software to merge the two clips together and the result is an awesome 360 circuit transition.
360-Orbit transition
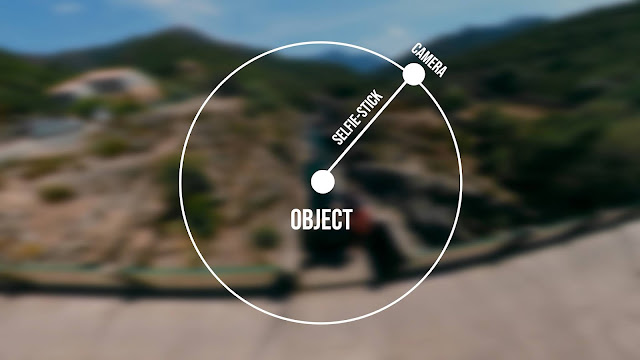
Transition number 4 is the 360-orbit transition. This one is similar to the 360-circuit transition, but this time the Insta360 ONE X2 circles the object with the selfie stick. To achieve this, mount your ONE X2 on the invisible selfie stick and swing it around your head. Do this in two different. Exact as shown before, reframe the video so that the object always remains in the center of the image. Don't forget to speed up the video again, and active the motion blur option. Then merge the two Shots together in your Video editing software and your 360-orbit transition is finished.

Roll transition
The last Insta360 ONE X2 transition idea, is the roll transition. This one is simple. In my example I used gestures to increase the effect. The only thing you have to do, is to change the Roll angle in your reframing software. Just take two Shots which you want to use for the Roll transition and add the Roll movement with 2 keyframes in each Shot. I recommend you to set the keyframe transition again to Fade-In Fade-Out for the best-looking result. Add the two clips together and your roll transition is finished.Gimbal Guru Tips
- Add “Whoosh” sound effects to increase your transitions. You can purchase my swoosh sound effects here: *Gimbal Guru Whoosh sound effects*
- You can massively increase your transitions by using Motion blur. Unfortunately, in Insta360 Studio you can only add motion blur if you speed up the video. This is the reason why I enjoy reframing my video with Adobe Premiere Pro* in combination with the GoPro Reframe Plugin. Here you have the possibility to enable motion blur in any situation + you can increase or decrease the effect with the shutter angle value. If you want to reframe and edit 360 videos in a more in-depth and professional way, I would definitely recommend you to use Adobe premiere Pro*. Check out this link to find out more: *Gimbal Guru Software*
As mentioned before, there is currently there is a special Insta360 Gimbal Guru Deal. With the code "GIMBALGURU" you get a 5% discount on your Insta360 ONE X2* and on top a free gift additionally. Don't miss this and get your Insta360 ONE X2* now. Check out the Link *HERE*
I hope you enjoyed this tutorial and learned something new. Subscribe to my Gimbal Guru Youtube-Channel for more Insta360 ONE X2 video ideas, tricks & tutorials. I see you in the next video!


0 comments